A Woven Klein Quartic

Curvature is determined by local geometry, and this can be controlled. A pattern with a particular symmetry is often in an infinite family of patterns, all with the same underlying motif, but of varied curvature — these patterns all lie on the same orbifold, changing the orders of cone and kaleidoscopic points, varying the geometry accordingly.

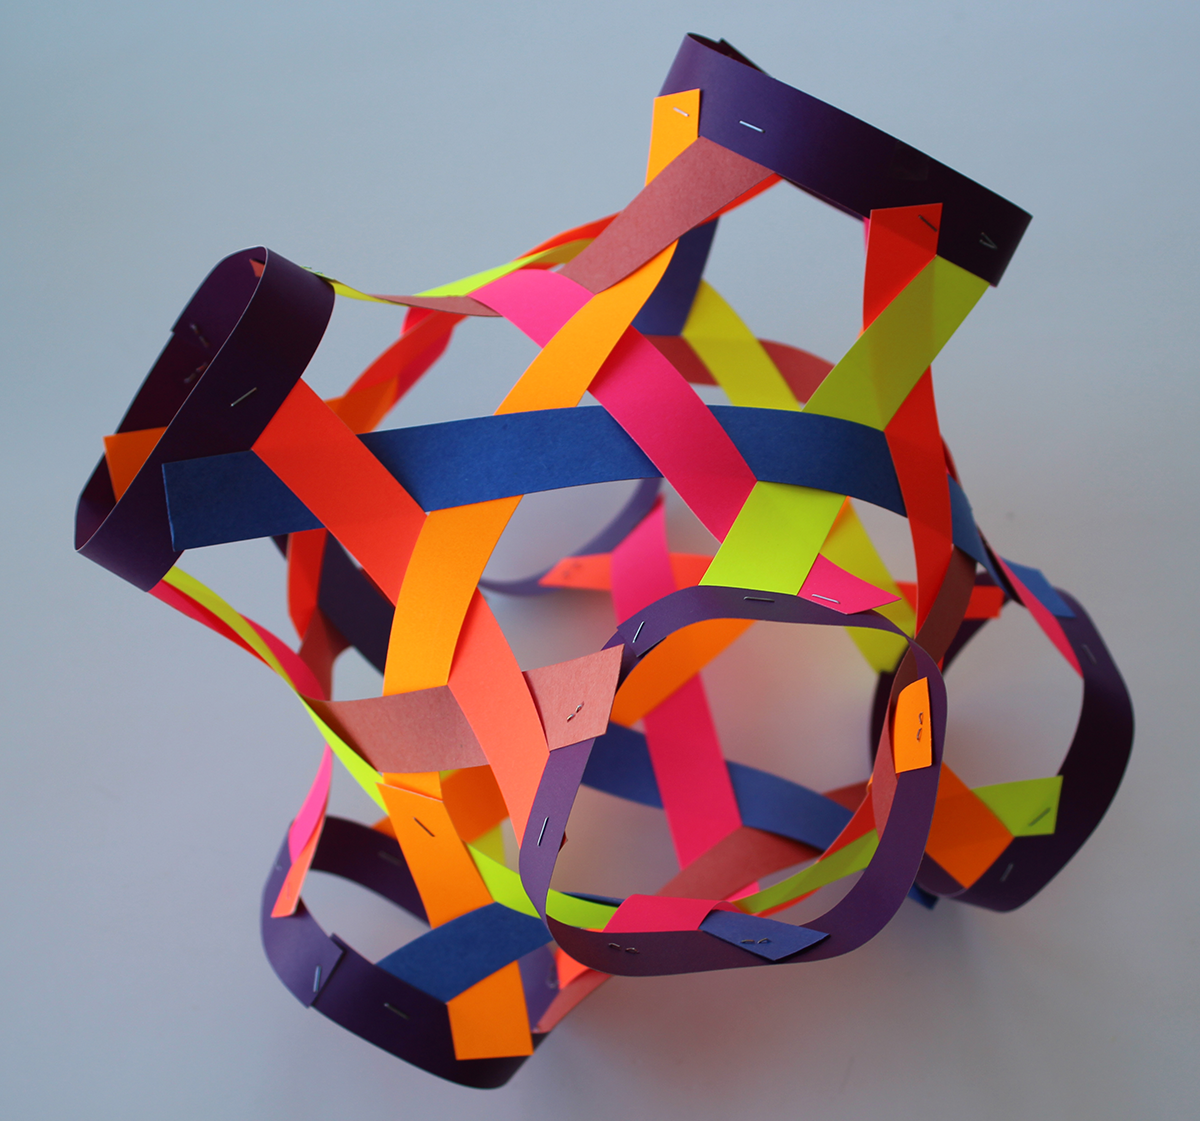
In the ancient Japanese kogame pattern, at right above, strips of material are woven in triangular junctures to form hexagonal holes. Curvature may be controlled by modifying these. (See this and this and this). With pentagonal holes, we have positive curvature, the weaving of a sphere by six bands each at the equator of an icosadodecahedron. Seven-sided holes produce the negative curvature of the hyperbolic plane, as we can physically demonstrate with the model at top left. (The angles at which the bands meet changes with the geometry; for the weaving at top left, they meet at about 58.057 degrees. There seems to be enough “give” in the construction that we can treat it as an even 60.)
The Klein Quartic is a famous abstract object (this, and this, and this, and this, and particularly The Eightfold Way, a book of essays that includes a translation of Klein’s original paper. Drawings prepared under Klein’s direction are still replicated today, and Heleman Ferguson has a sculpture of it in tetrahedral form, much as in the photo below.
The Klein quartic has many descriptions, but is most easily understood as a kind of regular polyhedral symmetry, not of the sphere, but as a tiling of a genus-three surface (we’ll denote S). This fimo dough model, sadly lost in service, had 24 regions, “faces”, each bounded by seven neighbors, meeting always in threes (here colored in three each of eight colors).

The platonic polyhedra are regular, not just because they have regular polygons as faces meeting in the same number at every vertex, but even more than that, on a regular polyhedron, any flag — any triple of a coinciding vertex, edge and face — may be taken to any other by some symmetry of the polyhedron. Though it is impossible to see in this physical model, this abstract, topological tiling also regular, and the Klein Quartic is the most regular of all possible symmetries on S.
Klein describe this tiling as a gluing up of a region of the hyperbolic plane, tiled with *732 symmetry. As goes with *pq2 symmetries, we can view this as a tiling by heptagons meeting in threes or as the dual tiling of triangles meeting in sevens. (In our weaving we will use their Keplerian “marriage”, two triangles and two heptagons meeting at each vertex, which we’ll denote 7373.)

We glue together marked sides of the polygon in such a way that colored paths continue, and matching triangles on the boundary of the polygon are considered the same — two such pairs of triangles are marked. On the glued-up surface, thick colored lines are straight paths, three of each color, all of the same length: Eight heptagons zig-zag across each geodesic before it closes up into a loop. Checking that this is in fact a genus-three surface, we have painted S with a metric of constant negative curvature, so that each heptagon is genuinely equilateral and equiangular, all preserved under the action of the symmetry group, which we’ll call Q.
We can also represent S in our space fairly naturally, by cutting it open along three disjoint non-separating curves. We may arrange these six newly cut-open boundaries symmetrically in space, along the usual coordinate axes with matching boundaries opposite one another. In turn a surface formed from this unit separates space into two congruent latticeworks and is a topological cover of the Klein quartic.


This seems promising: there is a well-known tiling of this surface by hexagons meeting in fours (or squares meeting in three’s), and Allison Grace Martin has beautiful basketwork renderings of this surface in that symmetry.
At a glance it would not appear that twenty-four heptagons could be nicely placed on this surface, but fortunately G. Westendorp shows us how. From there it is quick work to form the 7373 tiling of the weaving.
We can explain this model, now that we can see it: Q has a subgroup isomorphic to 432 ~ A_4. This subgroup preserves one of the colors of geodesic — though it does not look like it in the drawing in the hyperbolic plane, you can fix any one color by any of 24 symmetries related as the symmetries of the cube.
Cutting along these must produce boundaries that are geodesics in the physical model. Consequently they must be flush with the boundary of the unit cell — they are loops. Here are several identical colorings of the Klein Quartic, just cut open along different geodesics. It’s difficult to imagine, but these are all equivalent once opposite rings are glued up. Examples of equivalent points are marked — these show the same triple of colors but in two orientations. (Every triple that appears appears twice, but seven of the 7 choose 3 = 35 possible triples of seven colors do not appear; each pair of colors determines the third missing one — a Fano plane of missing colors.)

So how do we make one of these things?
Here is a template to measure the (unmarked) strips during the construction. Click to download a US-letter sized copy with these 11 inches long and 3/4 inches wide, or scale this to your needs, with an aspect ratio of about 15 to 1 for the long strips. As the figure says, you’ll need six in one color, then two short strips and two long strips in each of the other six colors. For three US-letter sheets each of seven colors, you can make seven models.

Dark gray regions of the template will pass under another strip; lighter gray regions will pass over. The matching letters in the templates are described below.
Cut out six strips of one color to the size of the top template, and then assemble these into rings, overlapping the left end of the template over the gray region on the right. (I like a small gauge stapler, or machine screws for larger models.)
At middle of the figure is a template for “short strips” and at bottom is the template for “long strips”; two short strips and two long strips are needed in each of six other colors, for a total of 18 strips all together.
Begin by attaching four differently colored short strips to the inside of a ring as shown, using the template to measure their spacing, matching the A marked on the ring template to A on the strip template. However that ring is colored (say ABCD), attach the same colored strips in opposite order (DCBA) to another ring. Attach each of the two remaining colors to opposite sides of two of the remaining rings, as shown at middle left in the figure.


Next, attach the loose ends of the short strips to other rings, following two simple rules: the strips and rings will form an octahedral structure, with the short strips on the edges of this underlying octahedron. Second, strips of the same color will be on opposite edges.
We now weave in the long strips. With a little practice the method becomes natural. Each end B of each long strip will weave over a B on a ring, then pass under a neighboring short strip. A short and long strip meet at their middles C, the long strip always over the short one. The rest of the weaving is just has to follow into place. Be careful: though the weaving will end up as over-under-over-under, etc, it may not be so during its construction!

We determine the colors of the long strips: Each color of short strip meets four of the rings. The other pair of rings will be connected by a pair of long strips in that color. Because strips of the same color do not cross, this determines which way these strips must travel.
Finally, the surface S will not be complete until we glue opposite rings to one another, at least in our minds! Looking at opposite rings, we can see that colors continue one through the gluing, and that opposite rings are attached with a one-quarter turn twist, which we can label with arrows or letters.
Thanks to the Gathering For Gardner for commissioning some bigger plastic models, and a huge thank you to Eric Vergo for a long day’s help painting.
They are great fun! (Kids love putting these together too!)


Here’s a handout if you use these materials with a group or class:
